Tuesday, January 17, 2012

More to come...


Here are some projects I've been working on:

Tutorials to be continued...


I didn't even touch up the pictures. This is the real deal people ...

Friday, November 11, 2011

S is for... Secret revealed!

S is for... Shower, Sydney, Shoes, and so much more :)
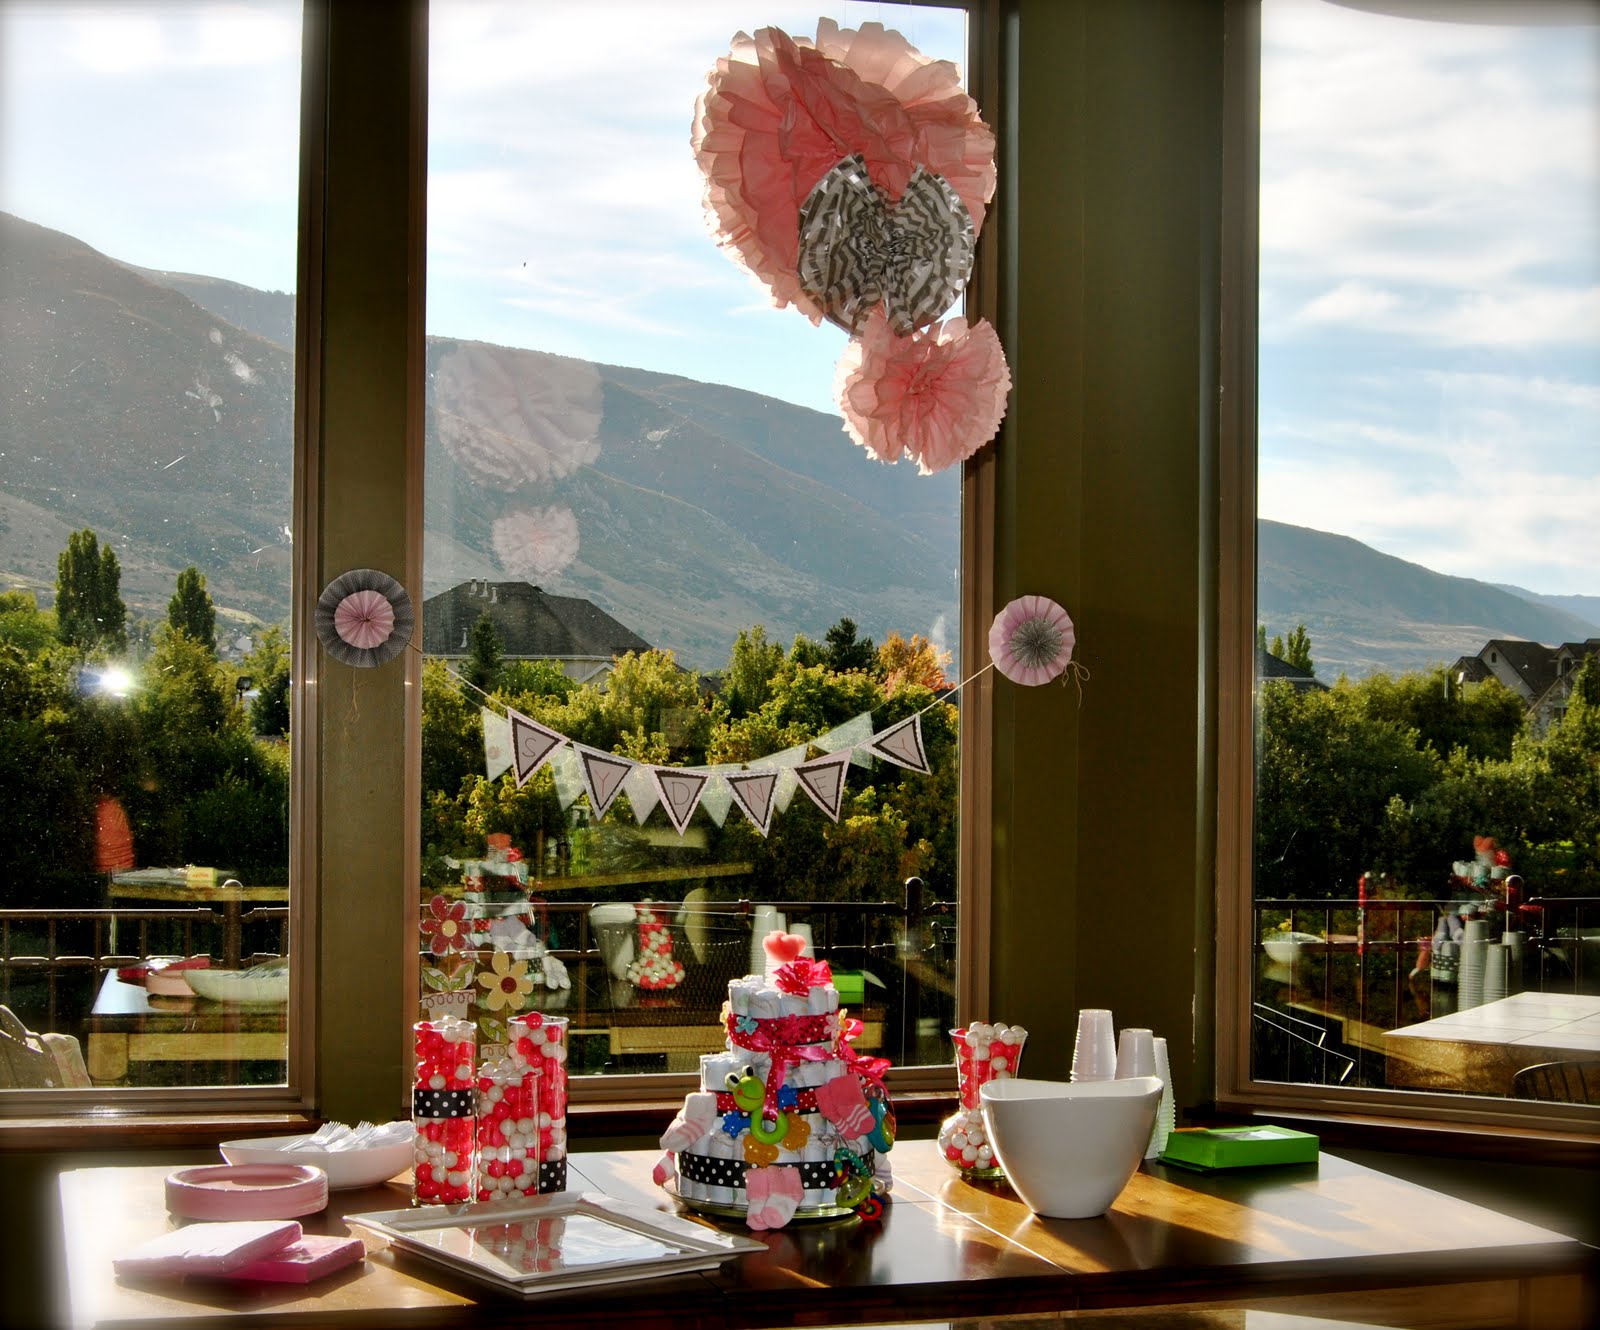
Here are a few photos from the shower I hosted for my sister-in-law

the invite


the decor


the food


the games & prizes


and the shoes I made


and Sydney


Everything went well and I think we all had a pretty good time :) Congrats Rachel!

(p.s- for more cute pics of Sydney visit our family blog!)

Tuesday, September 27, 2011

Random this and that....

Here are some random things I've been up to- I have been working on lots of crafts, but won't be able to show the finished products/projects for a few more weeks :)

So in the meantime:

A missionary card I made for my brother-in-law:


Easy freezer jam (I just followed the directions in the CERTO package for the raspberry-peach kind, yum!)


Why I love being a crazy coupon lady: (Total cost after coupons: $5.37)


And Macie trying to tell me I've taken enough pictures for today :)

Friday, July 29, 2011

S is for... Secret!

Okay- for those slightly concerned or miffed about my MIA activity- this is not the case- I really am crafting, stealing other people's super cute ideas, and cooking.... BUT- I've had to keep all my projects on the down low- since most of them are for a certain lil' someone who will be making their arrival in the fall (my niece we'll call "S") Shhhhh! It's a secret... She doesn't need to know how spoiled she's going to be or else she might want to make her arrival earlier ;) But I promise I will have oodles of projects to catch you all up on soon enough.... In the meantime, enjoy this:


This is a super easy DIY home decor project. I've seen this on multiple blogs and I give full credit of this idea to anyone that has done this project before me :)

Take any size foam ball (I got a multi-pack at the dollar store), push a gazillion thumb tacks into it (also dollar store merch) and glue the last few in to hold them all into place. Done. And. Done.

If you want to be fancy shmancy you could even spray paint them fun colors :)

Tuesday, May 31, 2011

P is for...Purses!

I happened to spot this adorable fabric at Joann's and pictured exactly what it's purpose was in life!


So I picked it up and purchased plenty of this perky, pretty, playful fabric (like way a lot plenty ... 2 yards too many plenty haha)... and stopped by here and picked up the pattern for her 241 tote (you should peruse her site, she's got so many cute things- and her patterns are step by step and super dummy friendly... note: the reason I could actually sew something other than a square)...and after a few minutes, okay... hours... and some assistance provided by my mom, and the periodic unpicking, this precious purse was produced!


And what better to go with it than it's very own pleated purse pouch with a pocket .... tutorial and pattern found here


... I told you they were precious, I'm pleased as punch :)

Wednesday, May 11, 2011

My attempt at gaining a green thumb...

I would love to consider myself a great gardener and landscaper.. but the truth is I'm a fantastic plant killer and yard wrecker haha... So here is my little attempt at gaining a green thumb... I figured start small, so I - with the help of my mom- planted this sweet beauty for my porch :) Who knows- maybe by next year I can have my dream vegetable garden, endless orchard and vineyard, and gorgeous flowering oasis... yeah.. umm.. probably not...

I already forgot the name of the grass looking plant in the back, and the 3 smaller ones in front are pink, purple, and fuchsia vine petunias I believe...


And this is how it looks on the porch... notice the little cutie in the doorway that's our new pup Macie :) ... visit our family blog joelandkell.blogspot.com to see more

Friday, April 29, 2011

Sneak Peaks.... Revealed!

Alright Easter has come and gone, and I have not posted a single thing... but here is what I have been working on...

A new Spring wreath!

A few weeks ago my friend Whitney and I put these together... It was easy, but time consuming... All you need is paper, a foam wreath, pins (we used ones with "pearlized" ends... way overpriced at craft stores, so go to Wal-Mart), and something to cut all the flowers out with... We used my silhouette, I think I would have given up after the fifth flower if I had to cut these out by hand haha.
Once all your flowers are cut, just start layering and pinning away...


After realizing that we had both run out of little flowers and pins, we filled the gap with big layered flowers, I did mine in a different color and antiqued the edges to make it pop... Whitney made silk flowers for hers :)


Just add ribbon and put her up!


On to the next reveal...

A couple weeks ago my cousin Whitney flew up from Arizona for her baby shower... She is having a girl and I'm so excited! I saw this idea a while ago from a guest poster on Tatertots & Jello (under my fan links) and decided that Little Miss (as I affectionately refer to her as) needed one... So I graciously stole (I justified stealing it because she needed a toy to match her cute quilt) some fabric that Whit was using to make a quilt and whipped up this little teething toy cutie pie...


(This picture is BEFORE I sewed it all together, I just had to be super sneaky and stealth like to get it done without Whit catching me)

I got the pattern (free) off the website, but I added some plastic lining on the inside to make it crinkle when Little Miss chomps on it :) I hope she likes it, and I can't wait to meet her!

P.S. The fabric I showed in the sneak peaks was for another owl teether that I made in boy colors but I didn't take any pictures of it... whoops

Friday, April 1, 2011

Sneak Peaks...

Okay- it's been almost two months since I have posted on here... I have been crafting, and making messes since then. I've just been really bad at taking pictures... but it's getting warmer outside- and I can smell Spring coming! So that can only mean one thing- lots and lots of cute and fun crafts, I'm really excited... Here's some lil sneak peaks....


Wednesday, February 16, 2011

S is for... self portrait

This self (plus husband) portrait I painted for Joel for a Valentine's Day gift + ... It turned out a lot better than I was expecting, and exactly how I planned it in my head haha... Sweet success! It's sleek, stylish, and sophisticatedly simple... I will apologize that I didn't take any before or during pictures, as to not disturb the people in the recording studio with my pounding feet across the floor... but I'm sure I will probably do another project like this one in the future, and I will be sure to take more action pictures then...


F.Y.I - This was painted on a 16 x 20 plain white canvas ($12 dollars for a 5 pack- whoot whoot!) with dark gray, white, and black acrylic craft paints ($0.33 per bottle on sale) using a sponge brush ($0.04- thats laughable I know) and a few of my high quality brushes (which I bought one at a time with a 50% off coupon since they can be pricey).
Total cost = about $3.50 not including the brushes I had on hand. And a few hours of patience and inhaling noxious paint fumes.

Monday, January 3, 2011

C is for.... Catching up!

Wow... I'm a total slacker- my apologies to the handful of people who read these posts. Anyway - new year, new toys, new projects! But first I need to do some catching up... Here we go...

A if for... Accessories!
This is an adorable, anthro-inspired, accessory, artistically adorned with amazing azaleas (or blossoms of some sort- haha) that I crafted for my sister for Christmas...

These are some of the ingredients used to make it: An old cotton shirt, hot glue, felt, and a silver chain, easy peasy...


This is a picture of it (that is me... I forgot to take one with her wearing it- oops) all finished...


And here's another one, since you can never have too many right?...


S is for... Silhouette!

Santa really spoiled me this year... I was splendidly surprised with my very own sleek and shiny Silhouette SD cutter! Seven second moment of silence for this spectacular slicer please....... thank you. Simply stunning... Enough said.

Sorry it's a little hard to see... She's sitting on the left... (lot's and lot's more to come)


M is for... Mural

I'll be modest... although I must say it was somewhat of a miraculous miracle that I pulled this off, I'm just thankful it didn't turn into a monstrosity of a mess...

This is a mural I painted for a children's play room... First sketched an outline....


Filled in some gaps... The lighting and my camera weren't really cooperating... but you get the idea...


Made some finishing touches... and this magically appeared...


A big project to send 2010 on it's way... not too shabby...

Wednesday, November 17, 2010

B is for... Bean Bag!

Ok... technically it's a corn bag, but what? ... that just sounds weird. Okay- so the other night my neighbor and I put these bags of blissful, beaming, bendy, blue, bean (corn) bed buddies together for those bitter cold, barefoot nights in bed... brilliant! Seriously, they could bump sliced bread off the "coolest" thing invented block... I love my bean bag buddy! Alright.. enough blabbering... Here's how to make your own:

Get some really cute fabric (and a 40% off coupon- yay).. I used flannel to be extra soft, and muslin for the inside lining... go to your local farm supply store and grab a 50 lb bag of whole feed corn (do not use any other corn, it will pop in the microwave) and try not to buy the cute lil potbelly piggies, and then gather up some thread and cute buttons laying around.. and that's it! My 2nd favorite part of this project (my favorite being that I have warm feet at night now) is that the total cost per bean bag buddy = $1.82... awesome.


Cut fabric (inside muslin- 6.5 in X 20.5 in. after folded in half.. and outside flannel- 7 in. X 21 in. after folded) and get sewing! The inside bag will look similar to this ... fill with 7-10 cups of corn (make sure to leave enough room that it can still mold around your feet, neck, stomach, back etc...) sew up the last side, and repeat with the outside layer (except don't sew the last edge shut so you have a way to remove the case and wash it...)


I microwaved the muslin bag for 2-3 minutes and let cool before putting it inside the cover (the corn tends to "sweat" a lot the first time you heat it)... then add your bling and buttons and you've got you're very own beanbag buddy!


Note to self: Don't use metal buttons to decorate it with ... hence the whole microwaving metal issue.. Don't heat more than 3 minutes in the microwave...

P.S- This also can be done with uncooked rice or dry beans but the corn is cheaper, holds heat longer, and doesn't stink up the whole room when microwaved.

Monday, November 1, 2010

W is for... Worms!

For our annual Farr Halloween bash I made my usual treat suspect... Jell-o worms... these are really fun and the kids really enjoy wolfing down the wiggly, wacky, wobbly, withering worms... I got this recipe from theidearoom.net, it takes quite a bit of time to do and is much easier with lots of people to help get the worms out of the straws but this is the basic how-to...

Take 100 of these... (straws not glasses..)


and fill up the cup with the jell-o recipe mixture... pop in the fridge overnight, remove the worms from the straws (hardest part of the recipe by far), crush up some oreo cookies to create a nice home of dirt for the worms to live in... and you've got a creepy, crawly Halloween treat for all to enjoy! ...( and a huge mess of semi-melted jell-o and cookie crumbs all over your kitchen... ) But it's all worth it... Enjoy!

A is for.... Avatar!

Alright this is what I've been up to for my latest Halloween crafting fun... crafting myself and husband into avatars!... Check out these amazing, articulate, artsy, agile avatars! (Full story on our family page joelandkell.blogspot.com). This was lots of fun, I had planned on getting avatar contacts (yellow with green edges) but they wouldn't get here till today.. bummer, maybe next year... I also made various Halloween treats bat sugar cookies, oreo mummies, and chocolate dipped pretzel mummies... but failed to capture them on film before they were captured by people's stomaches... I apologize... anyway I hope you enjoyed your Halloween!


P.S. We aren't by any means more articulate or agile in these costumes.... it was just wishful thinking....

Wednesday, October 13, 2010

W is for... Witchy pillow!

So I have been up to my neck in projects I've started, and I'm finally finished with some of them... this one I thought was just too cute... I embroidered a little picture I found online, and got some super fun fabric at Ben Franklins and whipped up this whimsical, wild, wacky, witchy pillow! (I only wish that whipped up didn't actually mean.... It took me 3 days to embroider the witch, then 3 hours to finally decide on fabric, then 5 hours trying to figure out how to sew the darn pillow case so everything was lined up and all the same direction... but alas...) Here it is!


and the back.... I just adore this fabric, who comes up with such cuteness?!

H is for... Halloween!

It's funny... I used to hate Halloween all growing up, mostly because it was scary I think, but it is becoming a fast favorite of mine, especially with all the cute decorations out there... so here is my happy, haunted, hokey-pokey, halloween hoop... (a.k.a- wreath)... I think I'm becoming a little bit obsessed about wreaths too- I have so many ideas for all sorts... I just need more doors I suppose...


So I just found the ribbon for 50% off at Michael's, and the wreath form with a coupon at Hobby Lobby, and I used straight pins instead of hot glue to attach the ribbons but I'm sure either would work just fine...


Cute, easy, cheap... enough said.

Wednesday, September 29, 2010

I is for... Inspiration!

While making a very big effort to organize my craft room, I came across my art portfolio... I love art, wait... let me clarify, I love drawing, coloring, painting, sculpting etc... however I don't love learning about art history, going to art museums, and I have never thought naked people in any way, shape, or form is art... I apologize if this offends you... anyway- I haven't really taken the time since I've been married to continue with my art, which made me sad...(or maybe it's because my cousin always called me a freak when I showed her my drawings (yes you Whit)... I'm sure you meant it in a very endearing way...) I really don't want to lose this talent... So here's to getting inspired! ....


Who knew cleaning out a closet could be inspiring... What is something you've done that gives you inspiration?... And just a little f.y.i - the close up pictures were of ink stipple, and prisma-color drawings :)